

Aloe Vera: Growing Health And Well-being At Your Fingertips
Aloe Vera plants are not only beautiful additions to your home or garden, but they also offer a range of health benefits. This low-maintenance succulent can easily be grown by new and experienced gardeners alike, providing its healing benefits whenever you need it.

Plants have been known to improve mental and physical health and well-being, but no more so than the Aloe Vera or Aloe barbadensis miller. Used as far back as Ancient Egypt, Aloe Vera or "The Plant of Immortality" has been used to treat sunburns, skin irritations, and wounds due to its anti-inflammatory and soothing properties. In more recent years, it is increasingly being found in various cosmetic and skincare products for its moisturising and rejuvenating effects.
Growing an Aloe Vera Plant
Position
- Aloe Vera plants thrive in bright, indirect sunlight.
- They should be placed near a window or area where they can receive at least six hours of sunlight each day.
- This plant is slightly more sensitive to sunlight than other succulents. Be cautious of exposing the Aloe Vera to direct, intense sunlight for extended periods of time as this can cause the leaves to sunburn.
Temperature and Humidity
- Aloe Vera thrives in warm, moderate temperatures around 25C.
- They can withstand temperatures as low as 5C but they are very frost sensitive. Move them indoors or into warmer areas of the home over the winter period to prevent the leaves from becoming damaged by frost.
- Aloe Vera is well-suited to dry and low-humidity environments. Ideally, humidity should be maintained around 40% which is slightly drier than normal indoor conditions.
- Adequate air circulation is important to prevent excess moisture around the plant. Proper ventilation helps prevent fungal issues and rot.
Watering
- When it comes to watering your Aloe Vera plant, less is more.
- These plants are native to arid regions and are adapted to survive in dry conditions by soaking up and storing moisture in their roots and leaves.
- Although this helps them survive drought conditions, it means that regular transpiration, the plant's ability to soak up water from the soil and dispel it through the leaves into the atmosphere, does not occur.
- If the moisture levels absorbed by the plant are at capacity, overwatering is a major concern and can easily lead to root rot and other issues.
- Allow the soil to dry out completely between waterings, and then water the plant thoroughly, ensuring that excess water drains out of the pot.
Soil
- Aloe Vera plants prefer a relatively dry, well-draining soil.
- A cactus or succulent potting mix is ideal for these plants.
- Avoid using regular potting soil, as it retains too much moisture and can lead to root rot.
- You can also add perlite or sand to the soil mixture to improve drainage.
- Aloe Vera Plants tolerate slightly tight and compacted soil and will produce more offsets, baby Aloe, when they feel a bit stressed.
- However, it is important to not leave the plant to become pot-bound as this will prevent the roots from absorbing nutrients from the soil, causing stunted growth and yellowing leaves over time.
- The best way to check if the roots are not too densely packed inside the pot is to poke your finger or a gardening tool into the soil. If you are unable to easily push through the topsoil down towards the bottom, then it is likely time to repot your plant.
- The new pot should be at least 5cm larger than the plant's root system to allow expansion. However, it is important that the new pot is not overly large as this can cause root shock.

Pests and Disease
- Aloe Vera plants are relatively resistant to pests and diseases.
- However, they can occasionally be affected by mealybugs or scale insects.
- If you notice any signs of infestation, such as white cottony masses or small bumps on the leaves, you can gently wipe them off with a soft cloth or a cotton swab dipped in rubbing alcohol or neem soil.
Propagation and Cuttings
- Propagation of an Aloe Vera plant involves removing healthy offsets, the small baby plants that grow at the base of the main plant, and allowing them to callous before planting them in well-draining soil to establish new, independent plants.
- Aloe Vera Plants can also be propagated from cuttings, however, this is usually when a leaf is removed in order to harvest the gel.
- Cutting should only be taken from mature leaves. These are generally thick and fleshy with a vibrant green colouring. They are also wider and longer compared to new or younger leaves.

Problems and Solutions
- Removing one or two stems from a healthy Aloe Vera Plant should not cause harm. However, if the plant is young or struggling, removing stems could stress it further leading to more serious issues.
- The plant may need some time to heal and seal off the wound where the stem was cut. This healing process could make the plant susceptible to infections or disease if not properly cared for.
- Although the gel from an Aloe Vera plant is used for numerous health benefits, it's important to note, that the yellowish sap or latex found just beneath the skin of the leaves contains compounds that can cause skin irritation and should not be consumed.
- There are numerous species of Aloe that appear very similar to the Aloe Vera. However, the white spots on the leaves and the distinctive growth pattern can help distinguish Aloe Vera from other species like Agave, Haworthia and Gasteria.
- Aloe Vera's are flowering plants but it is very rare that they do so. The plant produces tall stalks with tubular, colourful flowers, attracting pollinators.
- Aloe Vera plants typically flower in ideal conditions of bright, indirect sunlight and well-draining soil. Flowering occurs when mature plants are several years old and are exposed to stress factors like drought and temperature fluctuations.
With proper care, your Aloe Vera plant will continue to thrive and provide you with its amazing healing properties for years to come. Just remember to provide it with the right amount of sunlight, water it sparingly, use well-draining soil and repot it when necessary.
Homemade Aloe Vera Moisturiser

Creating your own Aloe Vera moisturiser offers control over ingredients, avoiding chemicals, and tailoring it to your skin, providing a natural, customisable, and cost-effective skincare solution.
Ingredients and Materials
- Aloe Vera gel (However many stems you wish to use)
- Carrier oil (such as jojoba oil, coconut oil, or almond oil)
- Essential oils (optional, for fragrance and added benefits)
- Vitamin E oil (optional, for its antioxidant properties)
- Clean airtight container or jar for storage
- Food processor or mortar and pestle
- Clean spatula or spoon
- Kitchen or gardening gloves (optional)
Preparing the Aloe Vera
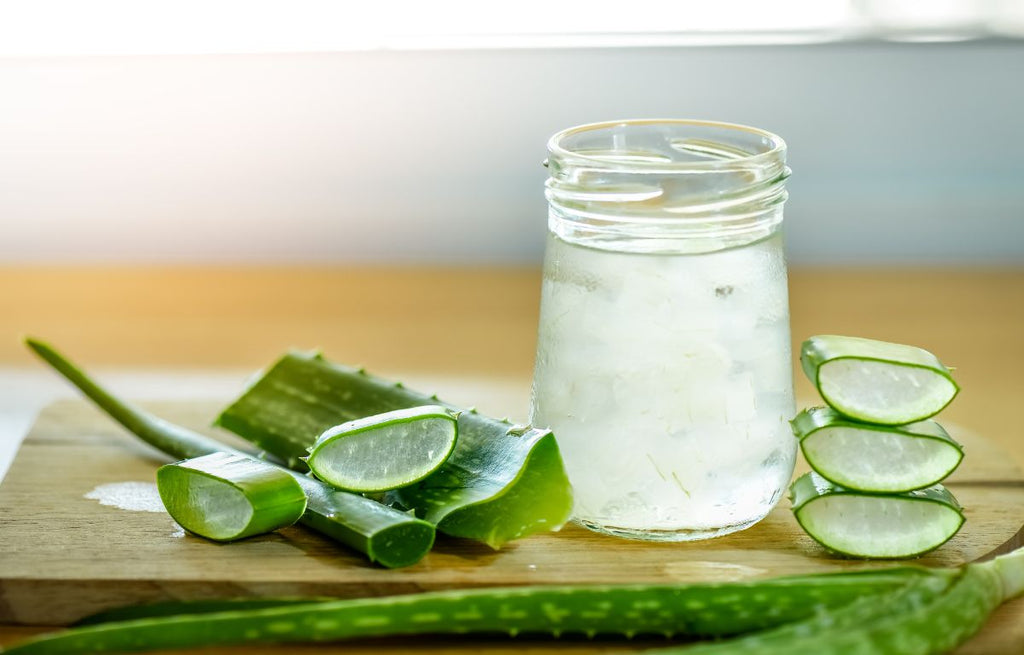
- Carefully cut a mature leaf from the plant using a sharp knife. Place the leaf upright on a cutting board and let it drain for a few minutes to allow the yellow sap (latex) to run out. Wear gloves during this process to avoid the latex from touching your skin.
- Using a sharp knife, trim off the spiky edges of the Aloe Vera leaf. Then, slice the leaf lengthwise to expose the clear gel inside.
- Gently scoop out the gel using a spoon. Be sure to collect as much of the clear gel as possible, leaving behind any green or yellow parts.
- Some people prefer to rinse the collected Aloe Vera gel under cool, running water to remove any traces of latex and potential contaminants. Allow it to drain briefly.
Combining the Ingredients
- In a bowl, combine a portion of Aloe Vera gel with a carrier oil of your choice. The ratio can vary based on your preferences, but a common ratio is 2 parts Aloe Vera gel to 1 part carrier oil.
- Add a few drops of vitamin E oil for its antioxidant benefits.
- If desired, add a few drops of essential oils for fragrance and additional skin benefits. Lavender, tea tree, and chamomile are popular choices.
- Mix the ingredients using a mortar and pestle or a food processor until the consistency is smooth and creamy.
- Transfer the mixture to a clean, airtight container using a spoon or spatula. Glass containers are a good choice to preserve the quality of the moisturiser.
Storage: Store in a cool, dark place to prevent spoilage. If you notice any changes in colour, odour, or texture, it's best to discontinue use.
Patch Test: Before applying the moisturiser to your face or body, it's recommended to perform a patch test on a small area of your skin to ensure you don't have any adverse reactions. Remember that everyone's skin is different, so adjust the ingredients and ratios based on your skin's needs and your personal preferences.
Be mindful of allergies: Although these ingredients are naturally sourced, if you have any allergies or sensitivities, it's a good idea to consult with a dermatologist before creating and using homemade skincare products.
Don't stop here! Read our next blog on how to regrow your veggies from scratch.